Video conference meetings are hard to love. At a first approximation, everyone hated meetings even back when we could sit together around a long table in a small room. (Remember that?) Now meetings don’t even have the advantage of giving participants a single shared physical experience to loathe. It’s hard to be a meeting these days.
And it goes further than that. One of the most challenging things about working remotely is that we lack the physical presence and face-to-face human contact that build social connection and trust. You can’t read a room if there is no room.
And so we have video conferencing. It’s the best mechanism we have to build human connection from afar, even if it like looking through a drinking straw.
Because video is at such a disadvantage to real life, it is critical to do the work to make it as good as possible. If the human on the other side of the call can see you clearly, look you in the eye, and not strain to hear you—if you remove as much mental overhead as possible—you have a much better shot of communicating clearly.
Communicating clearly is worth spending time and (some) money on. This is especially true for external-facing roles, like sales, where you represent your company, but it’s also important for anyone who spends more than an hour a day on video. The time will come when you need to have a difficult high-stakes conversation over video, and you will be glad that you prepared.
How you look and sound on a video conference call is literally how others see you. So be one half-step above what’s required. A small investment in time and money can have an outsized effect on how professional—and competent—you appear. And the bar is not that high. So many people do it so badly—how many noses have you looked up in dark rooms?
You can go out and spend thousands of dollars creating your own studio, use an expensive SLR as a webcam—the works. But looking and sounding better doesn’t have to be difficult or costly, even if you’re in a noisy space with kids running around. Here’s how I do it.
First, equipment.
Equipment
- Headphones. I like the AirPods Pro ($230). They sound great, they cancel noise, and I can wear them comfortably for hours. Noise cancelling is a must when you have kids running around. These are the most expensive part of the rig, but you can pick any headphones that are comfortable and you like. It’s really up to your preference.
- Microphone. A good microphone, well positioned, is the most critical component of the setup. Your voice needs to be easy to hear. I use this cheap lavalier mic ($16). Yes, AirPods have microphones, and they are an improvement over your built-in computer mic, but they like any bluetooth microphone they do noticeably compress audio. A wired microphone sounds better. You can go crazy here, but this will make you sound better than 80% of people out there. For presentations, I use the AudioTechnica ATR2100x-USB, which sounds fantastic but is bulky and gets in the way during routine calls. I’ve also read good things about the Sennheiser SC 160, which would double as headphones. Honestly, even the wired headphones that come with your iPhone are going to be better than your laptop microphone.
- Krisp ($40/year). This software is surprisingly good at filtering out background noises. I routinely do calls where my kids are screaming in the background and the person on the other end can barely hear them, if at all. It’s also really good at removing the sound of typing if you like to take notes. The downside is that it slightly reduces the fidelity, but on balance, it’s an enormous improvement if you don’t have a quiet room. I cannot recommend this enough.
- Camera. Laptop cameras are universally terrible. I use the Logitech c920 ($80), but that is hard to come by these days. Amazon is full of cheap knockoffs that are probably ok. If you want better quality and spend more money and time to get it, you can get an adapter and use an SLR as a webcam, but that quickly gets costly.
- Light. Lighting is important. Get at least one light that has adjustments for both color temperature and brightness. I’m fortunate that my natural lighting is good, but even so, my face is too dark compared to the background. This light ($36) is cheap and hokey but does the job. I have it clipped to my monitor stand. There are a bunch under various no-name brands on Amazon.
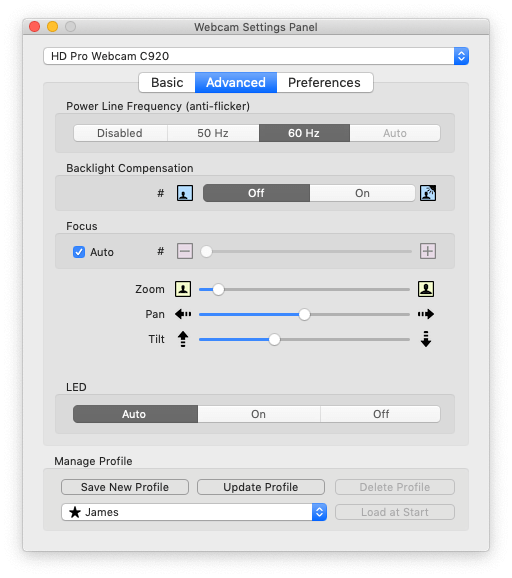
- Webcam Settings utility (mac). This is a great little piece of software that adjusts white balance, brightness, zoom, pan, etc. for your webcam. I adjust white balance, turn off backlight compensation, and zoom in a bit so I’m framed better and more tightly.
Now that we’ve discussed equipment, let’s talk about how to use it.
Look people in the eye
When I was in 5th grade, I was fortunate enough to be assigned as part of a mentorship program a local newspaper columnist. He was a great guy, a journalist of the old school, and my mother took me to visit him in his home study. One thing I vividly remember is that it was lined with hundreds of signed baseballs. It was the coolest room I’d ever been in. But the thing I remember more was that my mother reminded me many times to look him in the eye when talking to him. And she was right! I was a nerdy kid and I was not good at this.
Most adults naturally look people in the eye when talking in person, but I’ve found that as soon as people start talking in a video conference, all of the sudden the looking-in-the-eye rate plummets. People put the video conference window off in the corner of the screen, out of the way, so people look at that and it looks like they are distracted and not paying attention, even if they are.
If the purpose of a video conference call is to replicate as closely as possible an in-person meeting, then you must look people in the eye.
So first, camera positioning. Place the camera at the center of your monitor, just above eye level, and look directly at it. A common mistake here is people use their laptop, sitting on the desk, so the camera ends up below them, pointing up. It’s not a good look. If you are stuck using a laptop camera, get a laptop stand or put your laptop on a stack of books.
Second, place the video window in the top center of the screen, as close to the camera as possible. That way, you can look at the other person like you naturally want to, and it appears to them like you are looking them in the eye and paying attention. It’s critical that you look like you’re paying attention. Close any unnecessary application windows. That will help you actually pay attention.
Physical space. You’re not the only thing on camera! Is your dirty laundry on the bed behind you? Is there a stack of open cardboard boxes to the side? Fix that. Tidy up. If you can’t, use a tasteful Zoom virtual background. I’m not a big fan of virtual backgrounds—I think the weird blobby border effects around the human shape are tacky and distracting. But it’s better than a messy room. Note that your background does not have to be minimal and spotless. Mine isn’t (see below). But it should be respectable and undistracting.
(If you want to take things to the next level, get a green screen. They aren’t that expensive, and it makes the Zoom virtual background experience much better. I don’t do this, and don’t recommend it unless you have a lot of external-facing client meetings or you just like having a giant bright green sheet behind you.)
Next, lighting. You can read a lot about technique, but the main point is that at a minimum you want to be lit from the front, at as close to eye level as you can. Even if you have good ambient light, a light in front of you can fill in the shadows on your face and make you stand out against your background. At first, it will feel weird to have a light shining in your face. But you’ll get used to it. I position mine a bit up and too the side to avoid reflection off of my glasses. Use all the natural light you have available.
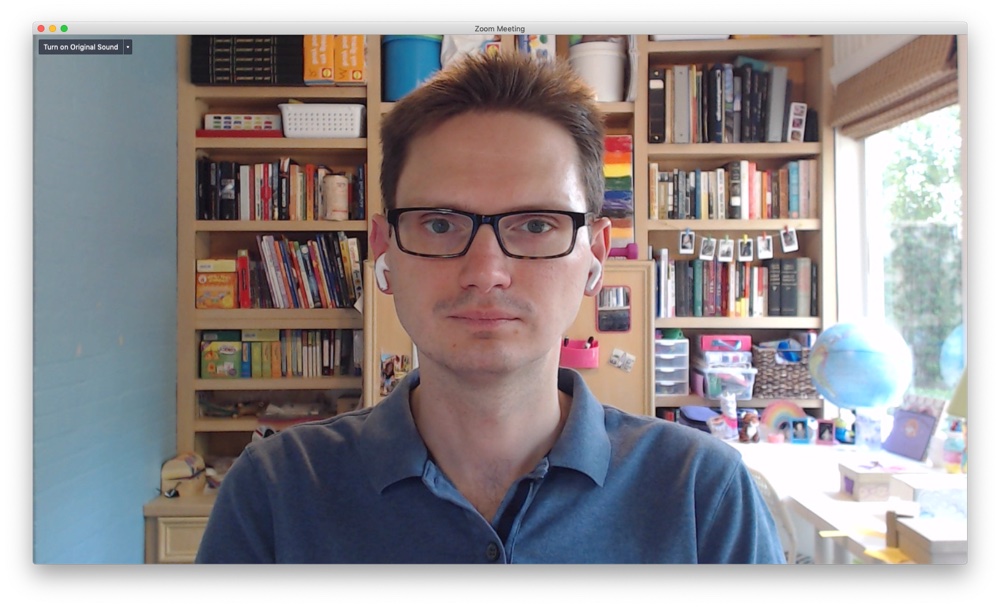
Camera adjustments. Proper white balance can make a big difference. Between adjusting the color of the your light and adjusting the white balance of the camera, you can make yourself appear much more natural and less like a carsick android.
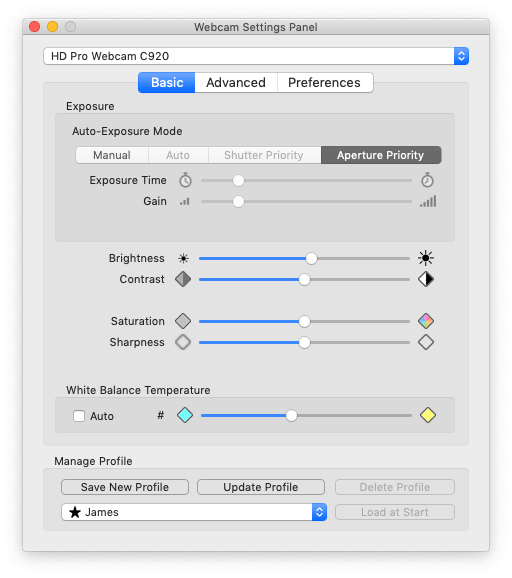
If you have a 1080p or higher resolution camera, you can also zoom in and pan a bit to frame yourself better, if you need to, without negatively effecting the video that most people see. My monitor is far back on my desk, so I zoom in a bit.
Here’s a before shot of the raw image from my camera before adding lighting or making any settings adjustments:
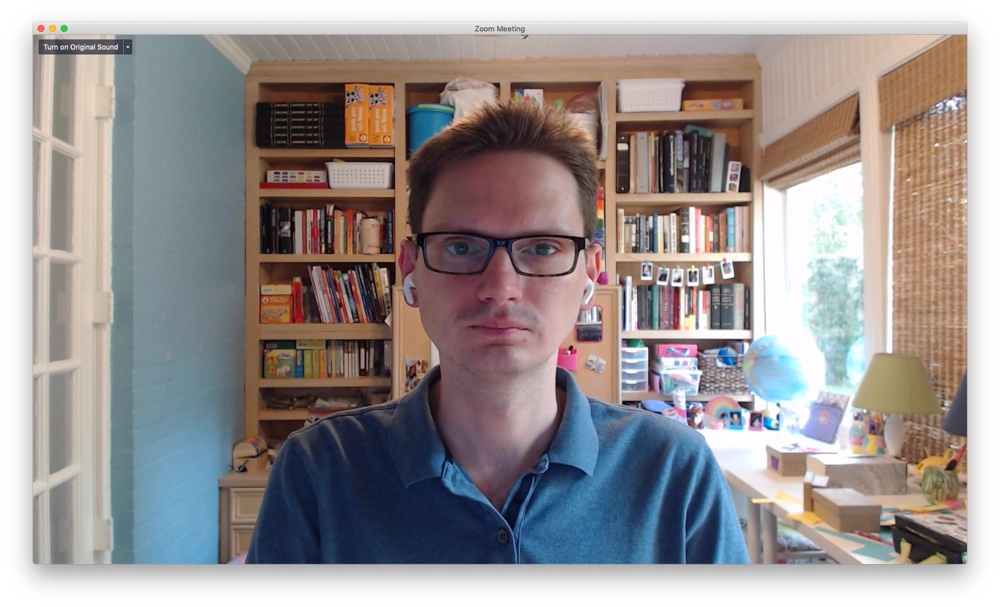
The positioning is not bad, but the rest needs work. Afterward turning on the light and adjusting the camera, it looks like this:
Conclusion
Putting this much effort into crafting your virtual conferencing appearance is an exercise in artifice. You are constructing an unnatural environment to appear natural. It’s a bit of a lie. But it’s in the service of putting your best foot forward and creating the best possible human-to-human communication.
Appendix: In which people take this much further
If you’re fascinated by the mechanics of this (like me), these are worth reading:
